Map Installation Guide (Legacy)
Before the Map Manager was developed, the serve method was used. It was more complex and differed
from map to map, but we can easily extract the files we need and port the map to the Map Manager.
Step 1 - Installing the Map Manager
Download the latest release of the Map Manager at https://github.com/Subway-Builder-Modded/subwaybuilder-patcher/releases. To download, click on the version that corresponds to your operating system.
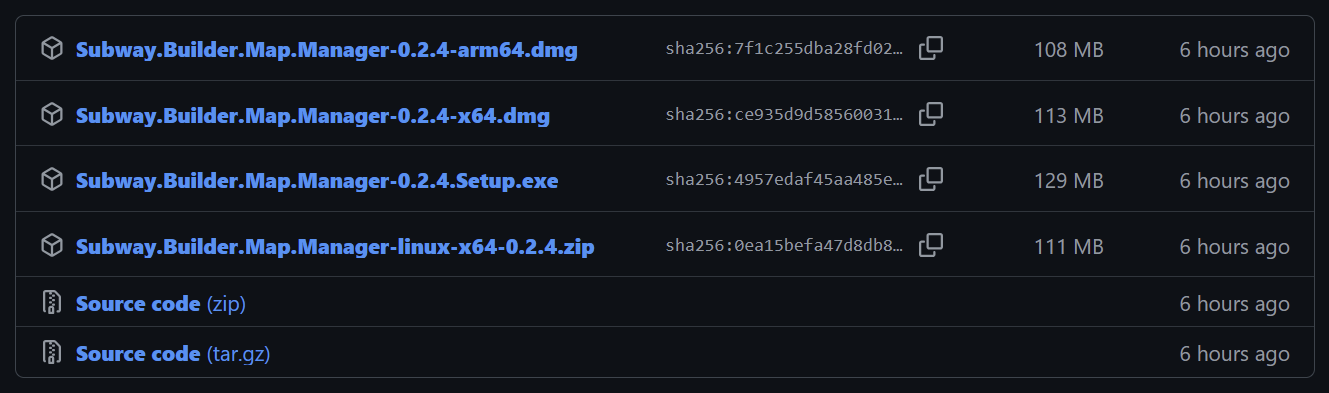
For Windows, you want the .exe file. For Linux, you want the .zip file. For MacOS, use
the arm64.dmg file if your Mac has an Apple Silicon Chip (e.g. M1, M2, M3, etc.) and the x64.dmg
file if your Mac has an Intel chip. As a rule of thumb, Macs newer then around 2021 tend to have
Apple Silicon Chips and older models tend to have Intel chips, but double-check as there are
exceptions.
On MacOS, the .dmg installer is likely to be quarantined. To run the installer, open a
terminal in the folder where you've downloaded the installer to, then run
xattr -d com.apple.quarantine {INSTALLER_FILENAME}. For example, when downloading version 0.2.7
for an ARM Mac, you would run
xattr -d com.apple.quarantine Subway.Builder.Map.Manager-0.2.7-arm64.dmg.
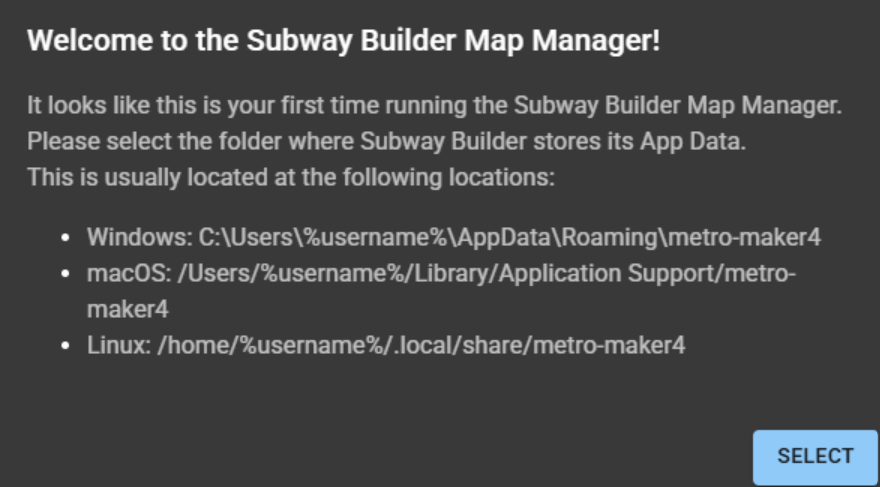
In addition, the Library folder containing the metro-maker4 folder may be hidden by default. To solve this, open Finder and open the Home folder, then select View -> Show View Options -> Show Library Folder.
After that, install the app as you normally would any other app. Once the installer is finished,
launch the app and run through the setup process, selecting your game executable location and your
metro-maker4 folder. At this point it is safe to delete the ZIP, the installer, and any other
files that you may have downloaded.
Step 2 - Extracting the Files
Now, we need to extract the files we need from the map that you downloaded. We will need 6 files in total:
XXX.pmtiles(XXXis your city code; e.g.MIAfor Miami)demand_data.jsonbuildings_index.jsonroads.geojsonrunways_taxiways.geojsonconfig.json
The first one is easy. In the map that you downloaded, search for the XXX.pmtiles file. It's somewhere in the directory, either in the root or inside of a folder. For now, create a temporary working folder so that we can store our 6 files.
The next 4 require a little more work. You should be able to find all of the files relatively
easily, however they are all in their compressed forms (they end in .gz). For this, we will need
to extract them as an archive.
On Windows and Linux, you can use 7-Zip to extract the
.gz archive. MacOS natively supports unzipping gzip compressed archives, meaning you can just
click on it to extract it.
Inside, you should see a single file. If you are in the demand_data.json.gz archive, you should
see demand_data.json inside, and the same goes for the other 3 archives. Extract all 4 of these
files and place them in our temporary working folder. Some maps have duplicate data files throughout
their directory. It doesn't matter which one you choose, as they're all the same.
The last file that we need is config.json. This one is the most difficult. For this, we need a few
things. Firstly, create a new file and call it config.json.
Make sure it's a .json file. Google how to enable file name extensions on your operating
system if the file type doesn't say JSON File.
Inside config.json, paste this template:
{
  "name": "Boise",
  "code": "BOI",
  "description": "Build a rapid transit network for one of America`s fastest growing cities.",
  "population": 329866,
  "initialViewState": {
    "zoom": 13,
    "latitude": 43.617499,
    "longitude": -116.245394,
    "bearing": 0
  },
  "creator": "muffintime",
  "version": "2.1.0"
}
We need to edit this data so that it matches our map. In the directory of your map, there should be
a .js file, most commonly index.js. Inside that file, you will see something that looks very
similar to our template.
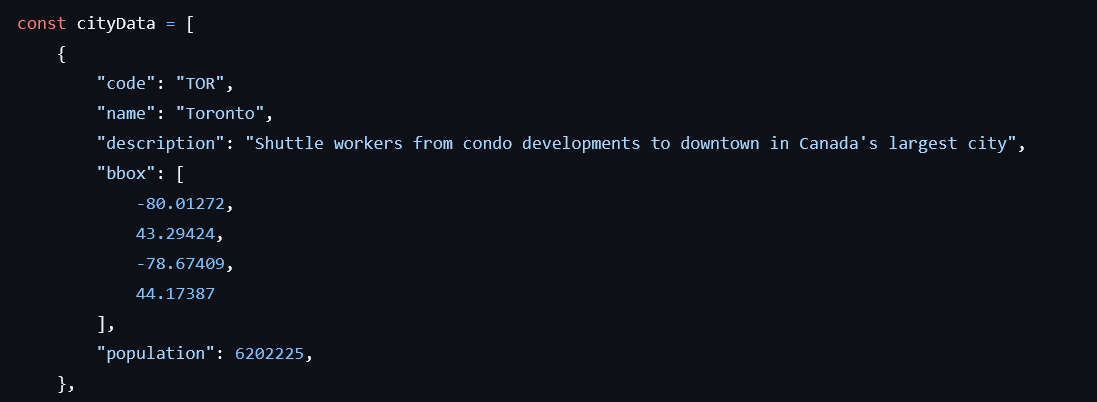
This is inside of the
index.jsfile of the Canadian Cities Map Pack.
If your directory has multiple .js files, check all of them. One of them has the data that
you need.
From this file, we can get:
namecodedescriptionpopulationintialViewState(and all of its arguments)
If your data does not include initialViewState, you can put 12 or 13 for zoom and 0 for
bearing. For latitude and longitude, you can pick any number inside your bbox coordinate range
(the latitude corresponds to the 2nd and 4th numbers and the longitude corresponds to
the 1st and the 3rd.) In the Toronto example shown above, we could use 44.0 and -79.0 for
latitude and longitude respectively.
The last 2 things that we need, the creator and version, can both be found in manifest.json,
which every project has. Once you get everything that you need for your config.json, ensure you have
all 6 files. After that, you're ready to move on to the next step.
While not required, if you plan on sharing this ported map, please include the
creator. This ensures that the original creators still get credit for the maps that they made.
Step 3 - Zipping the Files
Now that we have all 6 files, we need to package them into a .zip. This can easily be done on
Windows or Linux natively or using 7-Zip, or on MacOS by
selecting Compress. Once you have a .zip file, you're essentially done porting the mod and the
only thing left to do is to import it into the game to play it.
Step 4 - Adding the Map
To install a map, simply click on the ADD A MAP button and import the ZIP file that you downloaded
containing your map. Once that is finished, you should see the map name, the creator, and the
version appear on the screen.
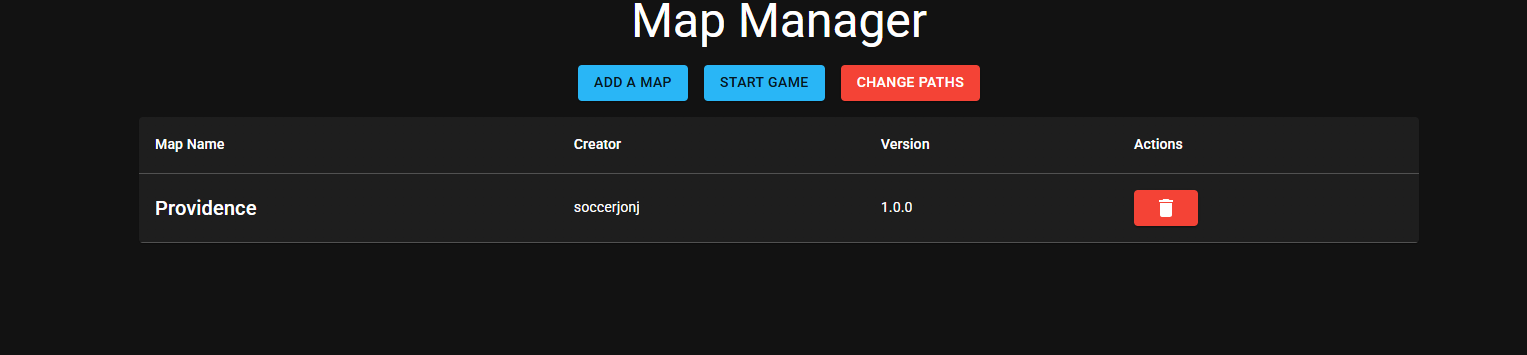
Step 5 - Launching Subway Builder
Once you have added all of your maps, you can launch the game using START GAME. This is how you
will launch the game from now on. In-game, your maps will appear under the CUSTOM tab, and they
are ready to be played!
Due to the way the game currently works, you must launch the game via the Map Manager every time you want to play a custom map. If you do not launch the game using the Map Manager, buildings and water will not appear ingame.